Executive Summary at Direktang Sagot
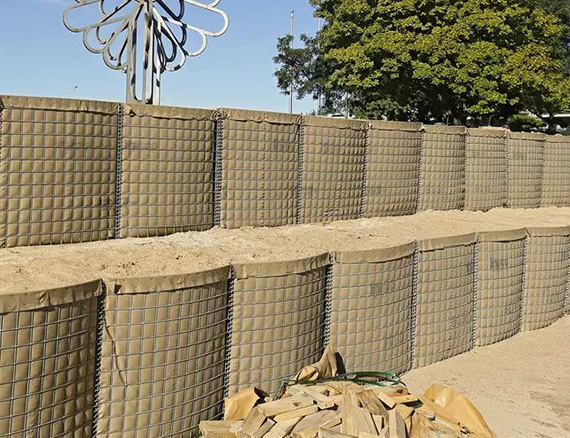
Deploying Hesco Bastion Barriers efficiently requires three key phases: site preparation, manual unfolding/joining, at mechanical filling with compaction. A trained crew of three workers equipped with a single loader can deploy and fill over $100\,\text{meters}$ of Hesco barrier per day. Proper ground leveling and avoiding oversized fill material are critical to preventing mesh deformation and ensuring structural integrity against blast or water pressure.
HESCO BARRIERS Standard Installation Workflow
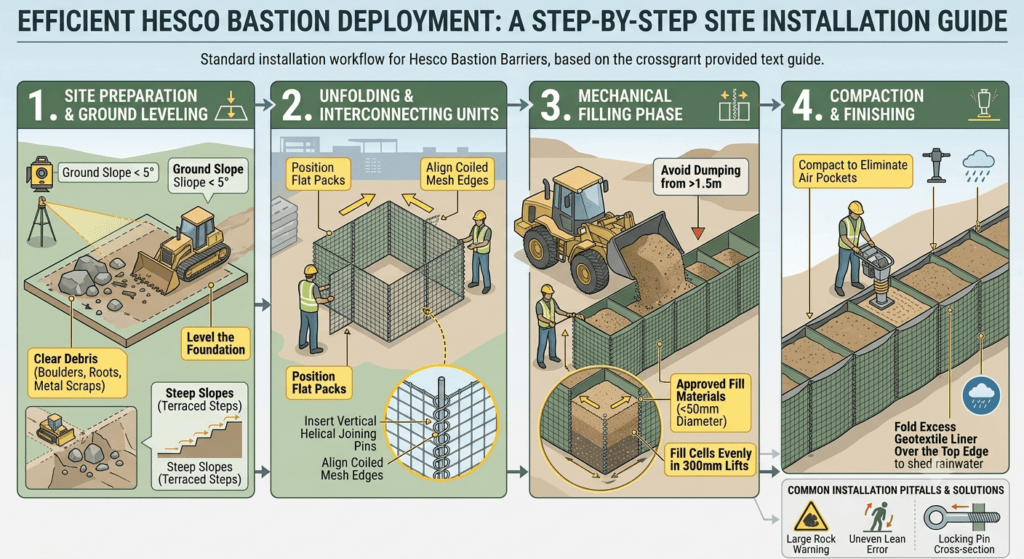
+-------------------+     +-------------------+     +-------------------+     +-------------------+
| 1. Site Prep &    | --> | 2. Unfolding &    | --> | 3. Mechanical     | --> | 4. Compaction &   |
| Ground Leveling   |     | Pin Connection    |     | Filling Phase     |     | Top Sealing       |
+-------------------+     +-------------------+     +-------------------+     +-------------------+
Detailed Step-by-Step Guide
Step 1: Site Preparation & Ground Leveling
- Clear Debris: Remove large boulders, sharp tree roots, and metal scraps that could puncture the non-woven geotextile liner.
- Level the Foundation: Ensure ground slope does not exceed $5^\circ$. For steeper slopes, cut terraced steps into the terrain to provide a flat base for each unit set.
- Drainage Check: In flood control projects, ensure the ground foundation has adequate bearing capacity to prevent uneven settling when filled.
Step 2: Unfolding and Interconnecting Units
- Position Flat Packs: Transport flat-packed units to the site using forklifts or crane trucks.
- Unfold Mesh Cages: Pull the end panels outward until the cells extend into square/rectangular configurations.
- Insert Connecting Pins: Align the coiled mesh edges of adjacent units and insert vertical helical joining pins from top to bottom to create a continuous wall.
Step 3: Filling Mechanics
- Approved Fill Materials: Use locally available soil, sand, gravel, crushed rock ($<50\,\text{mm}$ diameter), or granular earth.
- Mechanical Equipment: Utilize a front-end loader, backhoe, or excavator with a wide bucket.
- Filling Technique:
- Fill individual cells evenly in $300\,\text{mm}$ lifts.
- Avoid dumping large buckets of material from heights greater than $1.5\,\text{m}$ to prevent geotextile tears.
- Fill corner cells first to anchor the unit in place.
Step 4: Compaction and Finishing
- Compact the top layer using a mechanical tamper or machine bucket pressure to eliminate internal air pockets.
- Fold excess geotextile liner over the top edge to shed rainwater and prevent erosion of the fill material.
Common Installation Pitfalls & Solutions
| Mistake | Operational Risk | Corrective Action |
| Using Large Aggregates ($>75\,\text{mm}$) | Tears geotextile fabric, causing fine fill leakage. | Filter fill material to ensure aggregate sizes remain under $50\,\text{mm}$. |
| Uneven Cell Filling | Causes units to lean or bow outwards. | Fill adjacent cells systematically in progressive lifts. |
| Overshooting Joint Pins | Loose joints reduce structural integrity under blast loads. | Ensure locking pins pass fully through all interlocking wire loops. |